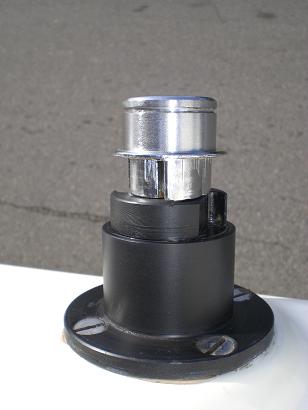
SWEET PEA  has four winches installed: two for the jib sheets installed port/starboard cockpit combing, one on the port cabin roof for raising the jib (and tensioning the jib halyard), and one installed in the cabin for raising and lowering the centerboard (needed as the centerboard is about 180 pounds).
I have no idea the last time the winches received any maintenance … if ever. I’ve had no trouble with their function. The port jib winch began to ‘leak’ a gray/black ‘goo’ over the cockpit combing during the 2010 summer. The time had come to perform a cleaning.
There is no standard winch installed on the M17s. I’ve seen all the major and minor brands over all ranges of years. SWEET PEA is a 1983 hull and has ARCO 6 models. Looking for maintenance suggestions on the Internet results in only a few ‘hits’. There is an Australian company that seems, based on sailing Internet forum posts, to support the winches –
Hutton-ARCO Yacht Winches
http://www.arco-winches.com/THE AUSTRALIAN YACHT WINCH (SALES) PTY. LTD.
4 Narang Place
St Marys N.S.W. 2760 Australia
Phone: +61 2 9623 2448
Fax: +61 2 9623 2265
Email: winches@attglobal.netThis company’s site makes no reference to selling a winch under only the ARCO name so i’m unsure if the ‘brand’ is now manufactured. There is reference to a ‘6’ winch under the HUTTON name. The only ARCO winches are ‘power-drives’ sold as HUTTON-ARCO.
No Internet search resulted in a written maintenance manual. After looking at many other brand’s manuals I noticed that 95% of the structures, parts and procedures were identical. So … I decided that i’ll take on the challenge.
Most of the boat forum members suggested creating a ‘catch box’ or bucket to surround the winch to keep any pieces from being dropped, of ‘popping’ overboard. I used what I had on-hand and cut a hole the size of the winch mount.
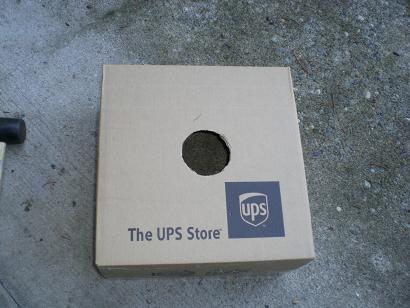
A second hole was cut to fit over the sheet jam-cleat.

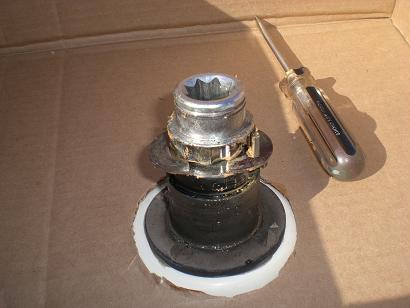
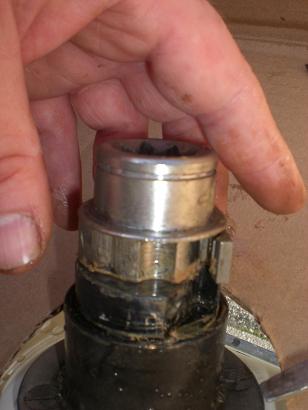
The only item holding the winch drum onto the boat is a retaining ring. Using a flat head screw driver carefully remove the ring. The ring sits in a groove under the head of the winch. Find the notch that is the beginning the the ring and use the screwdriver to CAREFULLY move the ring from the grove. The ring ‘wraps’ around the winch spindle about two-and-a-half times. Continue to work the screwdriver along the grove to ‘uncoil’ the ring. Be careful not to over-bend the ring as finding a replacement part can be difficult (see Hutton-ARCO Yacht Winches discussion above).

Once the ring is removed lift the winch drum. It should come off easily.

I was surprised to find no bearings. There are only ratchet pawls … yes this is really the only ‘mechanical component’ inside the winch.
Before taking out the pawls note their orientation. The pawls must be installed correctly in order for the ratchet function to work.
Remove the two-piece spacer between the lower and upper pawls.

Now, the pawls are ‘locked’ into position and you need to remove them in the correct sequence: lower than upper. Along the axis of the upper pawl spindle (the metal part) there is an indentation that you must align with the lower pawl.
Once aligned ‘wiggle’ the lower pawl upwards. Do this carefully as you don’t want to bend the pawl ‘springs’.
Once the lower pawls are removed spin the upper spindle so an upper pawl aligns with the lower pawl’s now vacated space.
Carefully ‘wiggle’ the upper pawl down into the lower pawl location. Once the pawl is in the lower location it is removed from the winch assembly as described earlier.
That’s it! You have taken the winch apart. In order to remove the upper spindle you must remove the winch from the cockpit combing. I don’t recommend removing the winch base unless you need to re-bed the unit do to a leak.
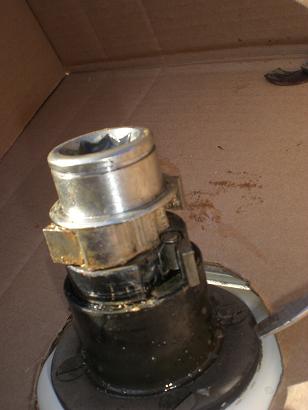
In the picture below you will note the grease covering the spindles.

All my reading has recommended only bearing units to have grease applied. Pawls should not be greased as they may become stuck and not engage the ratchet groves on the winch drum.
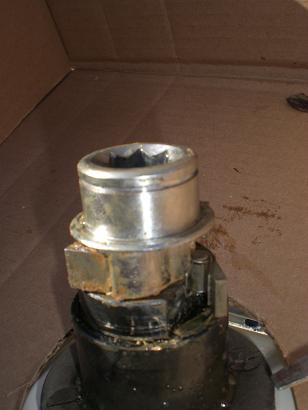
Clean the components. I don’t recommend spraying any cleaning compound on the spindle as any liquid will go into the ‘inner portion’ of the winch that you cannot access. A rag that is damp with your cleaning solution is good enough.
When cleaning the pawls be sure not to bend the springs. Note the orientation of the springs on the pawls.
I made the choice not to apply a winch grease. Everything was wiped with a light oil (3-in-1) after cleaning. This was more to protect against rust formation (everything on my winches are made of stainless except the plastic base and pawl spacer).
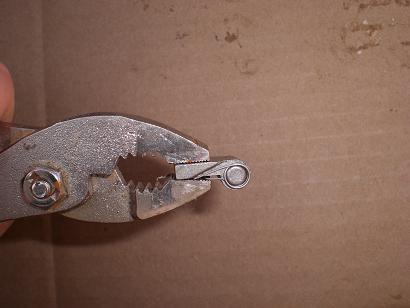
Reassembly begins with installing the pawls. The springs need to be carefully compressed so they will easily slide into their slots on the spindles. I found using a wrench and holding the springs to the pawl did the trick.
Returning the pawls to the spindles is a reversal of the removal process. Install the upper pawls first. Remember you must first insert the pawls into the lower spindle space, then align upper spindle so the pawls can be carefully ‘wiggled’ up into their correct home.
Once the pawls are installed apply a small drop of light oil to each. I used 3-in-1. Wipe away any drips or excess.
Re-install the 2-part spacer between the lower and upper pawl units.
Put the winch drum over the spindle. Turning the drum slowly so the ratchet groves align with the pawls.
Set the cover on the winch drum and re-install the retaining ring. Be careful and don’t over-bend the ring.
You are done!
REMEMBER:
-
Winch maintenance should be done yearly.
-
Make a ‘catch box’ so you don’t drop any parts overboard.
-
Take pictures as you take apart the winch. These photos can be VERY helpful during reassembly.
-
It is not recommended to apply winch grease to pawls. Use a ‘light oil’.
-
Work carefully when touching the springs and the retaining ring. These items can be bent or broken easily.
-
Don’t be ‘scared’ to do this task … I was able to disassemble, clean and reassemble my first winch in about 30 minutes. The second unit took all of 15 minutes.

Could you possibly tell me how to release the drum from the winch body on my Arco 7 winch The winch has been removed from the boat & the retainer clip at the top has been removed but the drum doesn’t want to move at all. I don’t want to damage anything by forcing it but I will if necessary. Thank yu for any advice that you could give me !
LikeLike
I don’t own a 7 so don’t know. If removing the retaining split ring at the top of the winch doesn’t allow you lift off the drum maybe the check in the handle socket hole for evidence of a bolt head.
Small Harken winches, for example, are held in place by a Philips round head bolt located at the bottom of the handle socket.
LikeLike
No bearings,look inside the drum you removed they arestuck there,never seen a winch without bearings
LikeLike