Each Sage 17 comes with a solid mahogany rudder and a laminated ash and mahogany tiller made by JO Woodworks. John does the finish varnishing for the tillers. The rudders are shipped having only received a ‘spit coat’.
When the items arrive they are unboxed and inspected for damage. The shipping company has twice damaged rudders and tillers so badly they were unusable.
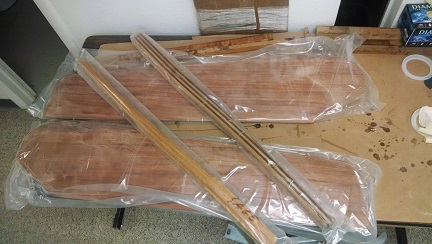
After inspection the tillers are put into inventory. The rudders need varnishing.
‘How to varnish’ is one of those topics that sailors can spend hours discussing and never come to a consensus. In the end most agree that:
- sand wood with 220 grit between coats.
- before the finish coat, if wanting ‘super smooth’ sand with 400 grit.
- be sure to clean up sanding dust before varnishing.
- work quickly to assure you keep a wet edge.
After the above each person ultimately ends up developing their preferred system that meets both the wood protection wanted and the preferred level of finish.
My first step in finishing is to sand (220 grit) all surfaces of the rudder. sanding is important to assure each coat is able to ‘grip’ the prior coat. Without sanding the the new coat can peal off.

Once sanded I remove much of the dust using a shop towel. I then dust again using a shop cloth dampened with Interlux 333. I use 333 as it is compatible with the Interlux brand varnishes used (more on specific varnish products below).
As the 333 drys I open varnish can and slowly stir to assure it is fully mixed. Don’t shake or stir quickly as this will introduce bubbles into the varnish. Another preference issue here concerning varnish: to use the can or pour through a filter into another container.
I apply varnish directly out of the can (gasp). Yes this breaks a ‘rule’. The reason it is recommended to use another container is to keep contaminants out of the varnish. You filter the varnish to assure no crystallized varnish, or contaminants, go into your coats. I leave it to you fine reader to choose how you wish to ‘containerize’ your varnish.
Which varnish to use? Again, another topic that can be discussed with little agreement. At Sage Marine for the first coats we use Interlux Jet Speed. This varnish is great for doing multiple coats in a short time, it drys fast, which is needed to fill the wood’s service cells. Jet Speed cannot be used as a finish coat as it has no UV stabilizers.
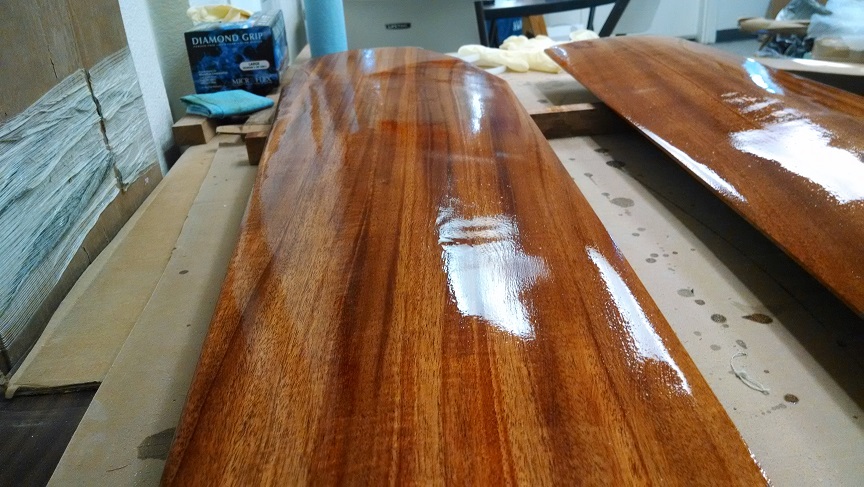
To protect the wood from UV damage, and stabilize the varnish against UV, we use Interlux Compass Clear. In addition to UV protection this varnish has a GORGEOUS high-gloss finish.
How many coats? As written above John at JO Woodworks has already applied a single layer of varnish. I will apply two coats of Jet Speed and then at minimum three coats of Compass. This results in there being at least six coats on the rudder. I will apply more coats if the finish isn’t perfect.
OK, I am now ready to apply the first coat of Jet Speed. Oh wait … what type of brush?!
I use disposable foam brushes when applying varnish. Yes, I can hear those of you reading that disagree. In general the recommended brush is a natural bristle high quality brush. If this is what you want to do I agree. I find the foam brushes work fine using a couple of tricks (more on this later).
As discussed above the first coats of Jet Speed are used to seal the wood and get a smooth finish. Jet Speed is a thin varnish so I find it doesn’t need to be mixed with a thinner (in addition John has already put on a first coat).
At this time Sage Marine doesn’t have a ‘dust free room’ in the shop for varnishing. This means I do this task in the reception/display space away from the boat shop’s dust. The rudders have not yet had any holes drilled to accept hardware so they cannot be hung and allow me to varnish all sides at the same time. So … I varnish one side at a time.
I apply the varnish in a thin coat working from one end to the other in 6″ to 9″ sections. I work quickly to assure i keep a wet edge.
Once the top is done i then, without adding more varnish to the brush, varnish the edges of the rudder.
I now run the ‘damp with varnish’ brush from the bottom to the top of the rudder to assure the coat is spread equally/smoothly.
One final check is made to assure there are no skips or runs. This is where good lighting helps.
I now use a shop towel dampened with thinner to wipe the lower edges of the rudder. This is to assure no runs travel onto the ‘back’ side.
After a few minutes some areas will look dull where before they were shiny. This is where the wood has soaked up the varnish. This is normal to see during the first coats and why you apply multiple coats.
It is now time to watch varnish dry. With Jet Speed I can usually apply a coat on one side of the rudder in the morning and then flip the rudders over and coat the ‘back’ at the end of the work day.
Once both sides are varnished, and dry, I sand the rudder with 220 grit, clean, and apply a second coat.
I will continue this topic when I begin applying the finish coats in a few days.
– Dave
NOTE: I originally posted this December 2014 on Sage Marine’s BLOG. In a short time the BLOG will be closed – stupidly. I am reposting this information so it is not lost.

2 thoughts on “Varnishing”